posted
A while ago I asked for advice on how to custom paint a helmet. I was given several suggestions on the bullboard and received some help in personal emails. I finished up the helmet recently and thought I would share the process I tripped and tumbled through.
I hope by sharing what I have learned that you might be able to breeze through your own project. if you so choose to travel down this twisted road. Be prepared, this is an epic!
A few lighthearted disclaimers/warnings to start with.....You will need a thick wallet to start something like this from scratch. I dropped about a G on this one but then again I bought some equipment to pull it off. More on that later. It might also be good to keep in mind that I can be a bit sarcastic. So let's go have some fun! Oh yeah, this is my second helmet job!
STEP 1 - DON"T TRY TO SAVE MONEY - SPEND THE MONEY FOR A SOLID COLOR HELMET
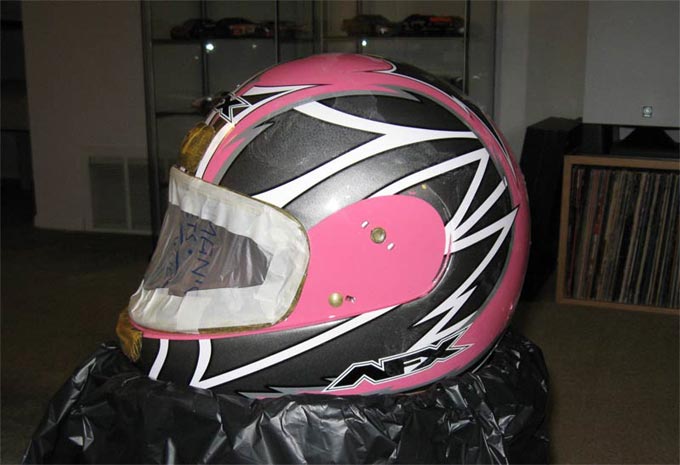
I found and bought a helmet online that was very inexpensive but it also had graphics all over it....like this...
I figured it was a cheap one to practice on and I could just wet sand the graphic ridges down a bit and go from there. NOT...the ridges proved to be a bit too heavy and the cheap clear coat they put on the helmet was peeling off in chunks......OK then, off to a fine start!
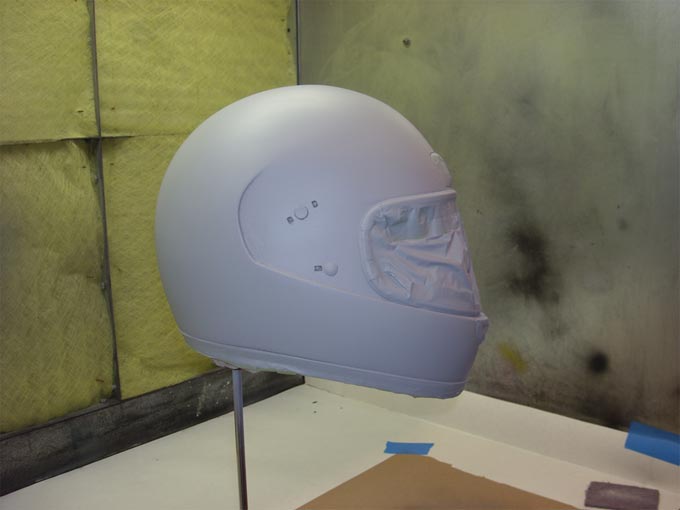
So, I spent about 10 hours and more $$$$ stripping all the clear, graphics, and nearly everything else off the helmet. Then I cleaned up that whole mess, re-masked it all and sprayed a couple coats of primer on.
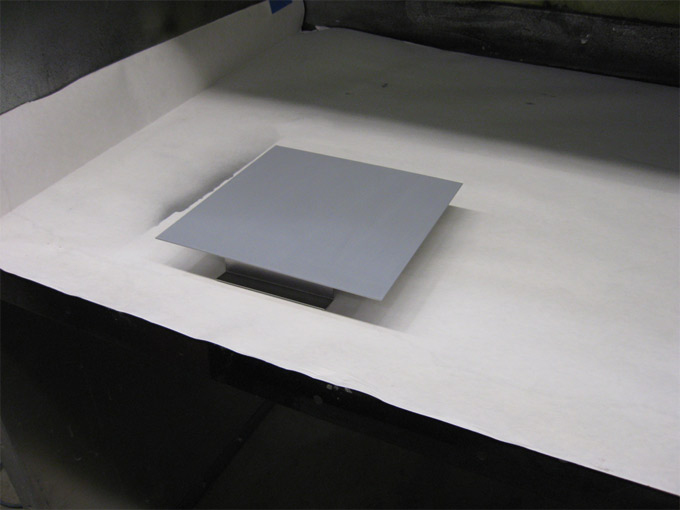
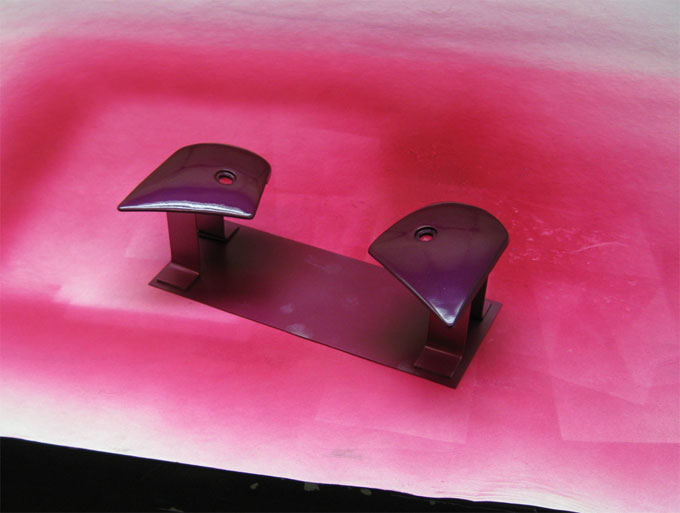
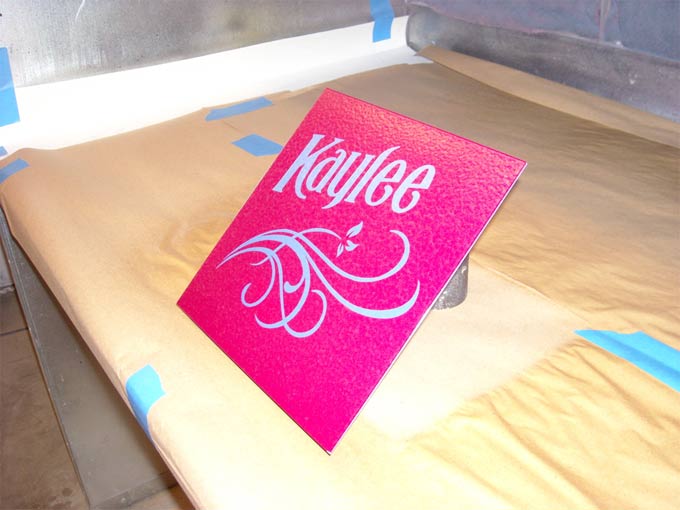
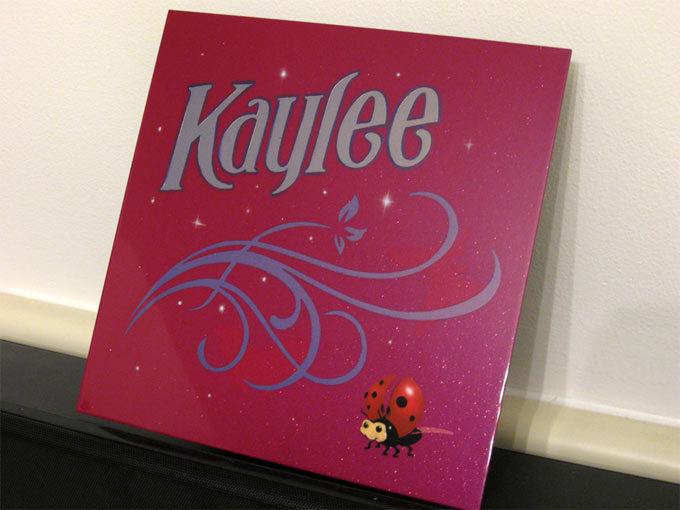
OK, one thing I did that was a good idea, was to make a little metal panel to follow along with through the process. I used all the same steps and paint so if it all went South, it would happen on the panel and not the helmet. Works great in theory!
STEP 2 - DO NOT SELECT THE MOST EXPENSIVE PAINT ON THE PLANET
I had a color concept in mind. My "client" described the color in her little mind and we also saw something she liked on one of the the new Harley's. Harley of course would not sell any quantities larger than a touch up bottle. So, I made a trip to the local NAPA store. Their paint guy handed me a Rod and Custom Colors chip book (Martin Senour Paints) and said they could mix them no problem. So, I picked out two colors for the "base" graphics and two colors for the top graphics. After getting over the shock of how much the paint was going to cost I went away so they could work their magic? When I returned to pick up the paint they said they could not mix the two top colors! They told me to try a body shop. I walked away thinking "don't you guys mix paint for body shops?"
So I ended up going to a Sherwin Williams Automotive paint store and they mixed up the two top colors. One is a gold pearl that changes to blue which was to be used for her name. The other was a purple pearl that changes to a similar blue when you move it around in the sun.
STEP 3 - DO NOT TAKE ADVISE FROM PEOPLE WHO HAVEN"T USED THE PAINT
Just because someone mixes paint, that doesn't mean they know what it does when it goes on! I asked one of the paint mixer dudes if it was necessary to perhaps spray down a silver base under the pearls. No they said it will cover everything under it!
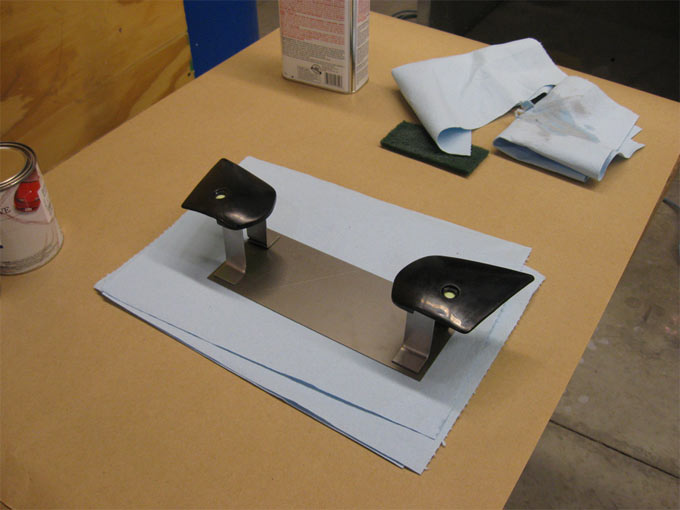
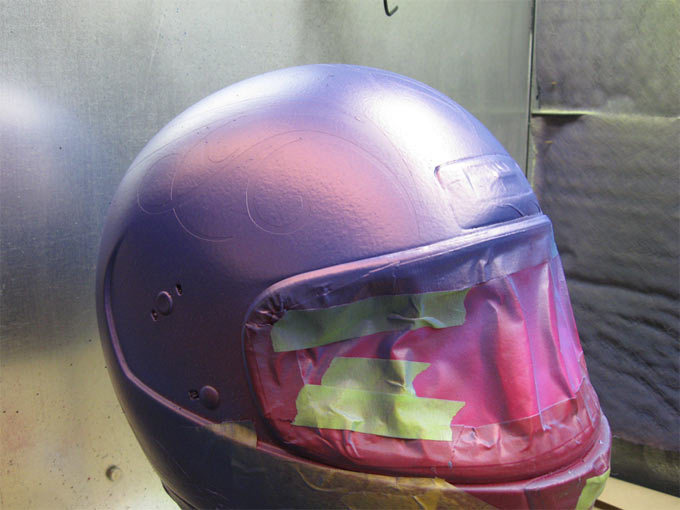
The temple covers on this helmet came painted gloss black. They had a nice finish so I decided to just wet sand and spray the base color right over the black. It'll cover right!
As you will see as we go along, the base color looks totally different depending on what color you put it over. It was quite red on the helmet and test panel and a deep purple on the temple covers.
posted
STEP 4 - DO NOT USE MATERIALS YOU ARE NOT FAMILIAR WITH
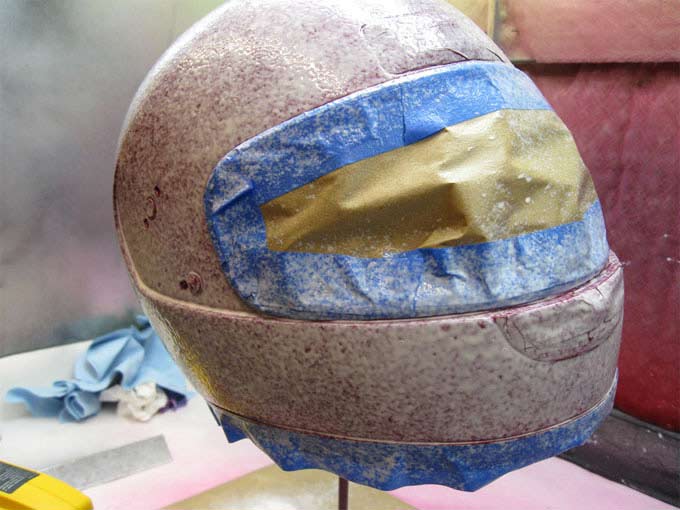
I have used a liquid masking product from Spraylat called Sign Strip that has worked in the past quite well. On a helmet with all the curved surfaces, a liquid mask correctly applied can save time over trying to bend masking paper all over the place. That is if the masking actually works!
I had found what I thought was a similar product and figured it would perform about the same as Sign Strip! I bought a Wagner power painter and hosed some of this junk on. It goes on white or blue colored and dried to a clear orange peel finish. What you cannot see happening here is a weird interaction between the base coat colors and the spray mask....
After I discovered the mask was sticking to what was under it, I decided to wash it all off! Thank goodness for the test panel right!
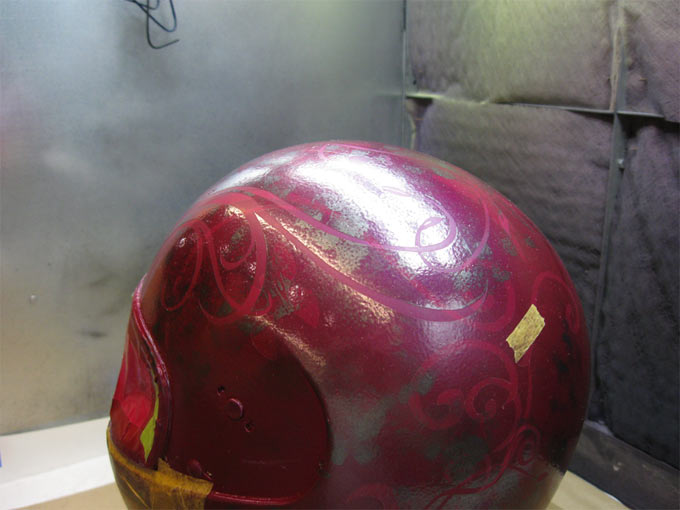
Then it was time to go back to masking the base graphics off! For this I used Nichiban tape. The stuff works great but it is sort of hard to find! The tape is about 004" thick and quite transparent. I masked off all the elements I wanted to remain the Razzberry pearl color.
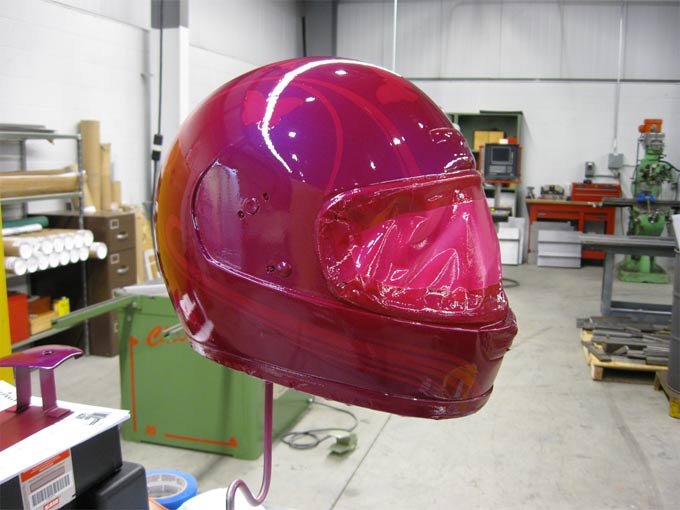
Then I sprayed the whole helmet a Blueberry pearl over the masked off graphics.
Then shot a coat of clear over both colors...
After this, I wet sanded the helmet to reduce the graphic ridge lines and then sprayed another couple coats of clear with a purple pearl flake tossed in for fun. Then you need to wet sand the whole thing again in preparation for the second layer of graphics.
STEP 5 - IF IT DOESN"T WORK ONCE IT WON"T WORK TWICE
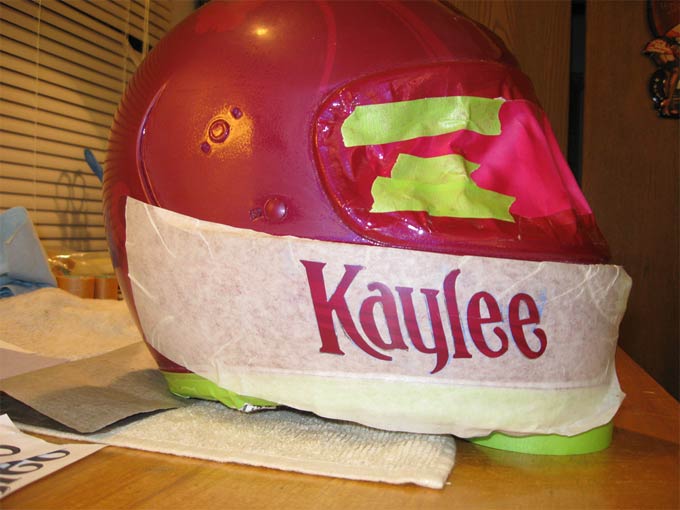
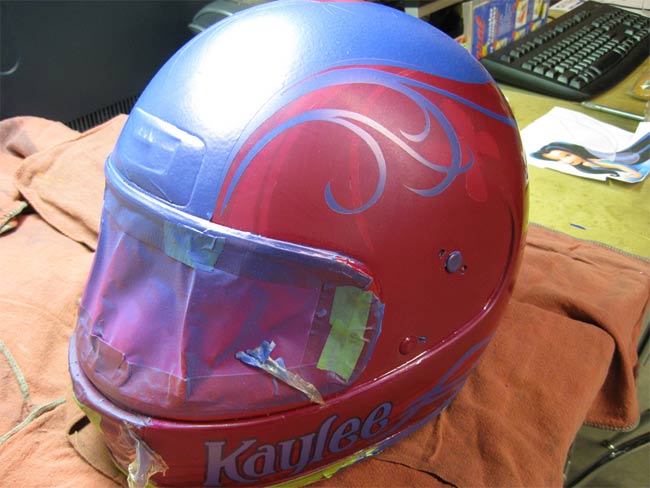
Next up was to paint the top layer of graphic on. I don't own a plotter so I do this all by hand. I did the name graphics in illustrator and printed them out. I then used Saral paper to transfer the name onto med. tack transfer tape applied to the helmet.
I then masked off the rest of the helmet and painted the name with the Bazzillion dollar per half pint flip-flop gold to blue pearl paint!
Then I thought to myself.....that spray mask was such a disaster, I should try it again! Maybe if I just put two coats on, it will all be well!
The scroll work was to be painted in another bazzillion dollar per half pint flip-flop purple to blue pearl. So, I had to mask the whole thing off to do the rest of the graphics. So, let's giver another go shall we!
posted
STEP 6 - DO NOT LISTEN TO THE CRAZY VOICES IN YOUR HEAD
After spraying that nasty spray mask on again, I discovered that it really only wants to stick to the uncleared portions of the helmet! Like both names on each side of the helmet! So, once again I CAREFULLY washed off the areas of spray mask over the names and left the rest on.
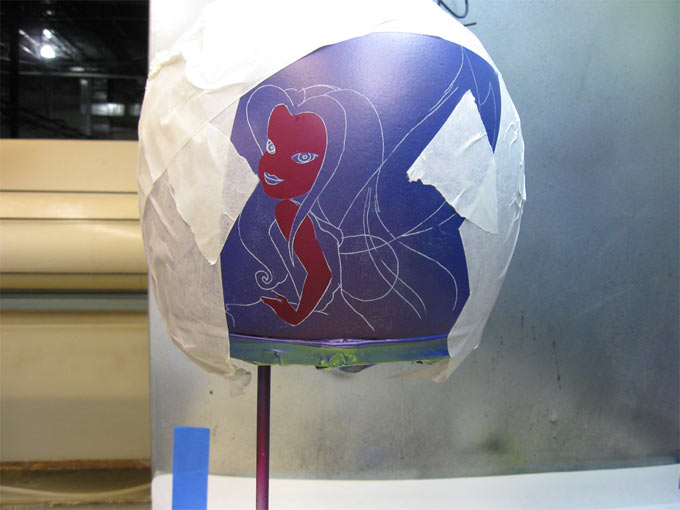
Then I transfered all the additional scroll graphics on with Saral paper and carefully cut them out with the an xacto knife. I peeled off just the scroll areas and left the fairy for later! The flat areas are where the paint will be.....
Then you shot on the Bazzillion dollar paint! I used a tri-coat base/clear paint. The first color is a solid medium blue base color. The Mid-coat is a purple pearl that goes on over the blue base. Not enough mid-coat and it looks too blue. Too much mid-coat and you kill off the bottom color. So follow directions if you have any and take your time!
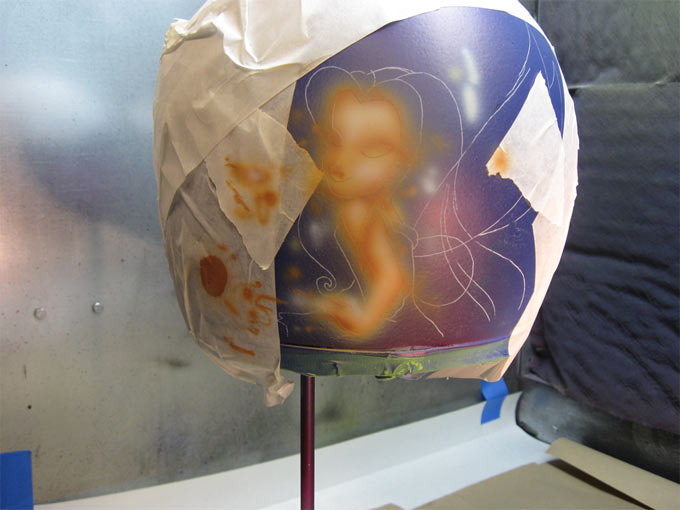
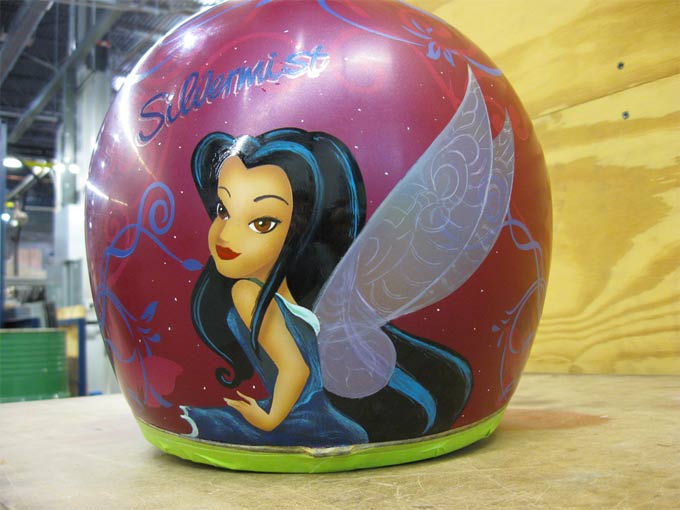
Then I peeled off the flesh tone areas of little Silvermist the fairy.
Then I airbrushed the flesh tones using 1-shot with catalyst added.....
Then worked in some of the other colors with hairy brushes....
Then start peeling off the mask to see what kind of monster you have created!
Actually, this project is a work of Love.... I am painting this helmet for my Great-Niece. She is 6 years old and one of the most lovely little kids you will ever meet! She is going to try her hand at go-Kart racing this summer, as soon as she turns 7, goofy age requirements!
Did you ever notice how doing something like this for someone you care about is totally worth every minute of effort, perceived trouble, and penny!
I realize I could have done something a bit more original but this is what she asked for....and Silvermist is really cool!
So, on we go.....remember the panel? It has been following along and will be framed and given to little Kaylee when I present the helmet to her.
The fairy is now pretty much done. I outlined the name and painted Silvermist on the helmet using blue pearl enamel. I also added some micro fine rainbow flakes to her wings for added affect...looks pretty sad until the final coats of clear are applied.
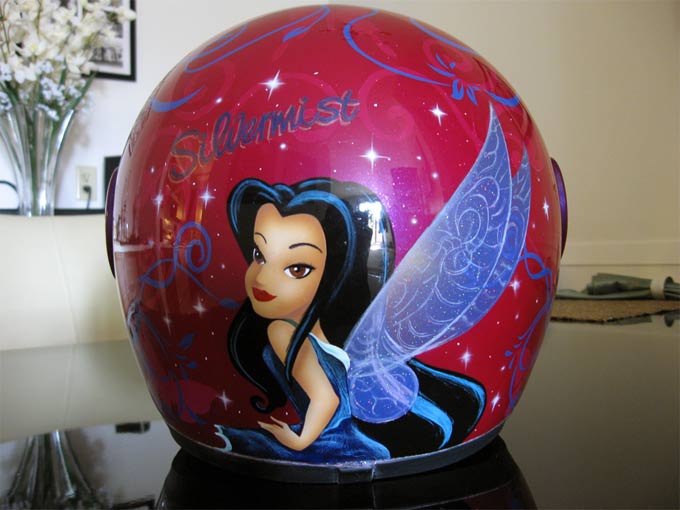
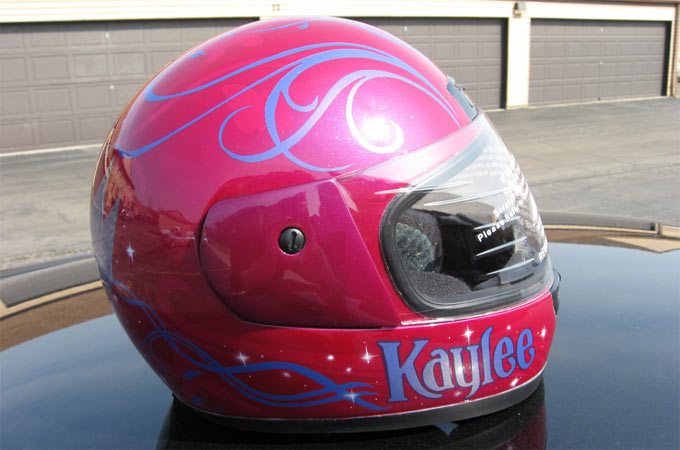
Speaking of which......Here is the helmet with the final coats of clear added, wet sanded where needed and buffed! Waiting for the mirrored shield to arrive!
And a parting shot of the panel.......all in 7 easy steps! Thank you!
posted
Whew, I'm exhausted just reading all that- thanks a million for all the postcautions (we can't quite call them precautions, can we )
Great job & great story Dale- I've thought about doing something similar- not as indepth as that, but was quickly turned off the idea by the bazillion $ price tags of the special stuff. I was going to g=have a go at using some dissolved urea which crystallises fast, for some crystal effects a bit like alsa makes, but haven't had a spare moment to think about experimenting.
Many thanks for the story!
-------------------- "Stewey" on chat
"...there are no limits when you aim for perfection..." Jonathan Livingston Seagull Posts: 7014 | From: Highgrove via Toowoomba, Queensland, Australia | Registered: Dec 2002
| IP: Logged |
posted
The finished product looks great Dale! I've done a few helmets. Yes, they are a lot of work and the pay is'nt the greatest but that's not why I do them.
Another thanks for the story!
[ April 01, 2009, 07:14 AM: Message edited by: Jerry Berg ]
-------------------- Jerry Berg South Paw Sign Washington State Posts: 87 | From: Washington State | Registered: Jun 2007
| IP: Logged |
posted
Auto Air Colors has some really cool colors and they are not too expensive either.
Do yourself a favor, ALWAYS spray sealer before base color. You will use half as much paint and save a ton of time. Plus everything would have been the same color.
We use DuPont sealer and it has different shades depending on the color base you are using. Every time we had said "The base should cover easy without sealer," boy were we wrong.
Both the helmet and panel came out very nice. If I were 6 years old and a girl, that would be my pride and joy! Your great niece is very lucky to have a $1200 helmet!
-------------------- Dan Beach Cylinder 9 Designs 1650 Glassboro Rd Sewell, NJ 08080 Posts: 625 | From: South Jersey | Registered: Sep 2008
| IP: Logged |
posted
Nice job, Dale. I'm aware of most of the headaches you encountered. Many of those paints are just too high-buck for me, especially when you only use a tablespoon, and you have 95% of it left,and nothing to use it on. I still have a bit of that around.
I learned too, if you're going to use liquid mask the Spraylat is the only way to go.
How long do you think it's going to take her to pay for it??
-------------------- Dale Feicke Grafix 714 East St. Mendenhall, MS 39114
"I can do all things through Christ, who strengthens me." Posts: 2963 | From: Mendenhall, MS | Registered: Apr 1999
| IP: Logged |
posted
Hey Dale, I already told her that my daughter will have to serve cup cakes at her wedding this summer because I spent all the cake money on paint! She thinks I'm kidding!
Hopefully I can use up the extra paint on the go-kart paint job?
Otherwise I'll have to invest in a new auto-darkening welding helmet for myself and color that up a bit!
posted
Dale, That was fun to read and very interesting.
It turned out Great! Look forward to seeing the cart.
-------------------- Sam Staffan Mackinaw Art & Sign 721 S. Nokomis St. Mackinaw City, MI dstaffan@sbcglobal.net Posts: 1694 | From: Mackinaw City, MI | Registered: Mar 2004
| IP: Logged |
posted
OooooooH Uncle Dale...You're The GREATEST! Now...What I wanna know is...How come the 1 Shot didn't react with the clear that you put over it? Is it because of the catalyst that you put in? And how 'bout House Of color paint? Or was it because you wanted to use the flip colors that are automotive paints?
I hope you realize that you have set the bar very, very high for yourself and any further gifts from Uncle Dale. Wow! It's really so sweet and Six or Sixty cute.
-------------------- Judy Grossman JG Signs & Designs 226 W. Jackson St. Sonora, CA 95370 Posts: 207 | From: Sonora, CA, USA | Registered: Dec 1998
| IP: Logged |
I didn't have any problems putting down the clear over the 1-shot. It was suggested that I add catalyst to prevent issues with the clear. For the most part I put catalyst in the fairy colors but on a flesh tone color or two I'm sure the quantities of color were so small I didn't add any?
Another suggestion was to put two very light "dry" coats on first and let it set a bit and then build up the gloss. This advice I did follow and it seemd to work pretty well.
I used the "value line" of catalyzed automotive clear (martin senour paints) available at NAPA. I have used Omni clears in the past with mixed results. The last time I tried spraying Omni clear it produced crazy little pock marks no matter what I did. Quite frankly the way the Martin Shour goes down, I will not be tempted to go back to the other brand. But that's just me.
I might get this helmet up to my little Great-Niece over the upcoming holiday weekend. Can't wait till she sees it!
posted
Yeah the fish eyes do really suck. No matter how well I cleaned and prepped the surface, it happened every time I sprayed the Omni at my past employers facility. There must have been a ton of airborne contaminates in that place?
The paint guy blamed on it me trying to build up a gloss too quickly. Said the solvents were evaporating too fast and causing all the little pits? I tried everything he suggested and got the same results every time!
All I know is that the clear I am currently using goes on like a dream, so I'll keep using it!


![[Wink]](wink.gif) )
)


![[Smile]](smile.gif)


 Printer-friendly view of this topic