|

A window for the
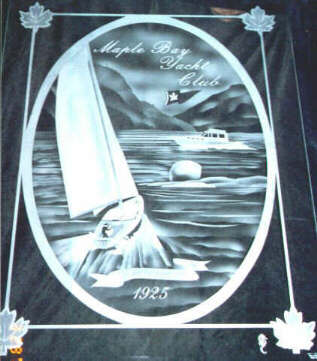
Maple Bay Yacht Club. 26 x 36 Completed on March 30 2000
|
 The Sketch The Sketch
For the price I quoted the
customer was to supply a "camera ready" piece of artwork. Not being
too nieve, I expected to have to do a little clean up of the design.
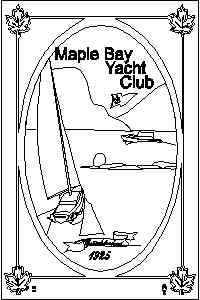
This is basically the sketch I ended up with after about 2 hours of
computer design and clean up of the artists design.
|
 Sketch #2 Sketch #2
O.K so tis is where I made
my mistake. I'll admit that at this point I should have increased my
price. Live and learn.
After three more visits with the customer
to "confirm" the design, this was the final outcome. (sorry about the quality of pictures on these two
sketches. I hope to fix them soon!) :)
|
 The Etching The Etching
Step 1
Taking the above sketch to my
good friend Mark Paetz at The Instant Sign
Shop. I had him cut a vinyl mask out of sign vinyl for
me.
Carefully I measure and apply the
vinyl. |
 Step
2 Step
2
I print out a line drawing and shade the different
areas of the design to remind myself what level of blasting each
element will have.Then, using that print out, I number the elements
in the order I will blast them. Always making sure no two elments of
the same number are touching. (clear as
mud?)
Here I have removed all the #1 elements ready for
blasting. |
 Step
3 Step
3
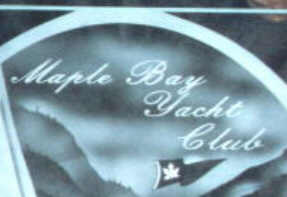
I have used 150 grit silicon carbide with 15psi with
a pressure pot blaster for this job. I got a nice depth of carving
in the centre of the leaves and in all the text. I don't recommend
trying this on tempered glass. It can explode in your cabinet and
give you one heck of a mess to clean up! It just happened to work
for me this time (knock on wood). Here's a picture after the first
blast. |
 Step
4 Step
4
Here's a look at what the glass looks like in my
cabinet. I have a glide thru carver from Photobrasive Systems so I
can put virtually any length and up to 6 ft wide pieces of glass in
it.
I made a mistake in the order of carving , so as you can see
I had to remask an area at this point.
The big ROCK hasn't been blasted yet in this shot.
|
Step 5
Unfortunately at this point I
got so involved with what I was doing I didn't take a break to take
pictures.
Sorry!
Refer back to the finished piece for the rest
of the steps.
I got into some free hand stuff in the water , sky
and mountains, using pieces of removed resist and cut or ripped
paper for masks |
 The Sky The Sky
Leaving the
mountain shapes on I just lightly blasted in some cloud shapes.
(simple huh?) |
 The Water The Water
Much trickier! I took some
of the ripple masks out and blasted them fairly heavey first. I then
took the background water mask off, leaving some of the ripple masks
that were closer to the mountains on.I then took a piece of vinyl
backing paper and cut a wavy line along it. I used this mask to
lightly free hand blast some texture. |
 The
Moutains Last, I took off the mountain masks. I the used
the left hand mountain pieces as a freehand mask to lightly dust in
some misty trees.For the right hand mountains I tore a piece of
vinyl backing paper and used that for the farther away mountain and
trees. The
Moutains Last, I took off the mountain masks. I the used
the left hand mountain pieces as a freehand mask to lightly dust in
some misty trees.For the right hand mountains I tore a piece of
vinyl backing paper and used that for the farther away mountain and
trees. |
.
Voila!
Now go out and try your
own. It's not nearly as hard as it seems!
Thanks for visiting. :)
|
|
|