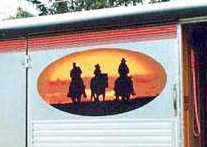
Sub-contracting digital vinyl printing can be costly. This is especially true if you mess up and need something reprinted.
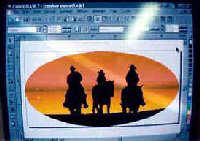
In our shop, we use CorelDraw 7, but the following can be done with
most signmaking software. First I scanned the image and then converted
it to black and white, 1 bit. The resulting image was then traced and
saved as a vector file. The next step was to alter the artwork to the
customer's approval and finally do the final scale drawing. Notice I
omitted the grass, It’s easier to add by hand later. The majority of the sky’s color in mind, GSP Apricot was chosen as
the base. Since they want an oval final image, I plot the vinyl, but do
not weed it yet. Using the scale drawing as a guide, I determine the
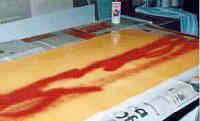
horizon line, then ‘eyeballing’ the photo I start spraying the
sunlight, clouds and highlights with Krylon right from the can. Be sure
to have adequate ventilation or you’ll feel like you just got home
from a Grateful Dead tour. If Krylon isn’t available, find it (no other paint I’ve tried
will work as well). Spray on some paper or something else to be sure the
nozzle works right and get a feel for the spray pattern. I start with
yellow, because it is the most distant, then red, and last, warm brown.
You don’t necessarily have to wait for complete dryness between
colors, but care should be used to not apply too much paint in one spot
or crinkling will occur. Clean your ‘airbrushes’ by holding upside
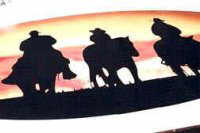
down and spraying until no paint comes out. As the paints dry, I plot
and weed the black silhouettes. The black vinyl is now applied to the weeded oval and trimmed to fit.
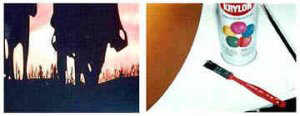
Now, lets do the grass (no Dead jokes here). I use a really cheap brush
that I have cut most of the hair out of . Spray some black Krylon into a
small container, and then using careful little strokes, add the blades
of grass. NOTE: If you get paint in the background it WILL NOT wipe off without
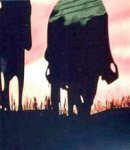
taking the other colors with it. When the black dries, a clear coat of
the entire image with some Frog Juice (Sunscreen 7000) finishes the job.
Allow the clear to dry, mask it (low tack if ya got it) and the graphic
is ready for application just like any large format print. Unless a true photographic image is needed this saves
the customer about 1/3 to 1/2 of the cost of digital and it’s done in
house. The customer was very happy with the job and now wants a picture
of his dog on the front. Sit boy! Stay.
Pat and his wife, Jan Orick, operate MOD, Moorehead Orick Design in Columbus, Ohio USA. In his spare time, he is a moderator in the Signmaking discussion area of Chris Dickman’s i/us website and serves on the Board of Directors for the Columbus Computer Society. (This is because he is really bored since the Grateful Dead no longer tour.) Take a few minutes and visit the Moorehead
Orick Design website or drop them some e-mail.
Thanks for sharing this with us Pat! [ Home | Join Us! | Bulletin Board | Events | Find A Letterhead | Become A Resident | Letterville Merchants ]Copyright © 1997 The Letterhead Website |
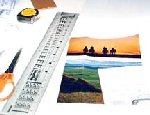 After
experiencing a Butch "Superfrog" Anton workshop, I started
using his Norwegian Airbrush technique whenever I could. It’s a great
way to add special effects to vinyl (Sign Business Magazine-July 1997
issue) and is priced about 1/10000th of the cost of a thermal resin
printer (also discussed in the same issue).
 One
day a customer handed me a page from a magazine and wanted ‘something
like this’, about a 5’x 2’ oval, put on the side of his horse
trailer. The first thing I thought of was having a digital print made.
Not only is it a printed photo, he only wanted 3 horses, in a different
order and the riders wearing different hats. That in itself is tough
with photo-editing software. I went to work on a digital quote. I looked
at him said it would be about $400. By the time he got up off the floor,
I remembered the FROG! I said I could do something really nice by hand
for half that and I got the down payment.
