Well to
install bubble free vinyl on any surface there are very important thing
you must do first. Surface prep is very important. If there is any
possibility that there can be
any grease or wax on your material I recommended a
good degreaser I use Rapid Prep for this. After the degreasing I re
clean use the Rapid TacII. when you do this cleaning you should use a
unprinted white paper towels and do not go over the area that you
already cleaned with the already used paper towel as you can
contaminate. The surface should be lint and dust free as any of this
lint/dust can create bubbles and the vinyl can trap the dust under it
and cannot be removed.
A good squeegee free of nicks as vitally important. I used the 3M gold
squeegees and on one end I place the fuzzy side of velcro for installing
digital printed graphics and this eliminates the scratching of the
printed graphics or even eliminating the little scratches on the cut
graphics then you re squeegee.

A sharp squeegee free of
nicks is very important as these nicks can be the biggest culprit of
bubbles. The edge must be smooth and the best way I have found is to
sharpen your squeegee. You can do this by rubbing the edge at an angle
on another squeegee in a back and forth motion. Working both sides of
the edge till you get a smooth nick free edge.

To do a banner the first
thing I do after the cleaning it to tape the banner down to the table so
that is does not move under the graphics, that would create installation
problems. Measure and place the graphics to the banner according to your
layout. I will be showing you how to do two kinds of hinges, a top hinge
and a side hinge. Also I will show you how to register a 2 color graphic
using registration marks.

TOP HINGE
After the graphics have been
taped into place along the top edge we can now begin to install the
graphics.

On a long line
of copy with large letters I cut apart the letters for more manageable
pieces.

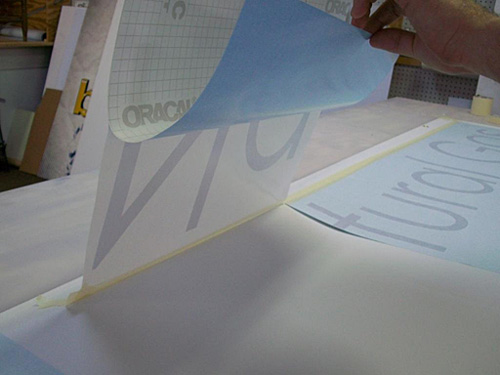
To begin you
start by removing the backer from the transfer tape, pulling it only
half way down creating a kind of bridge to hold and keep the vinyl from
touching the banner until you are ready to squeegee. Remember that the
vinyl is pressure sensitive and will bond with and pressure that
includes if it touches the banner and you try and pull it off.

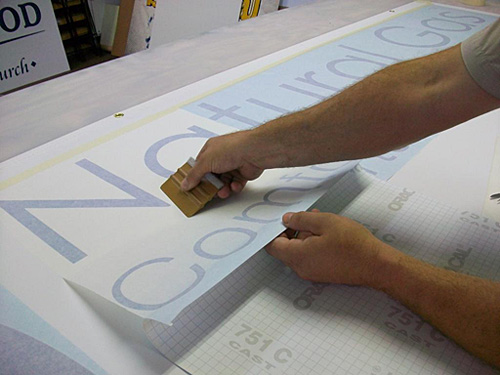
OK now when you
begin to squeegee start of course at the top and squeegee into the
graphics holding the pulling horizontal but holding the squeegee at an
angle so when you are pushing or pulling the squeegee you will be
pushing the air to the bottom of the graphic not towards the area that
you already applied. This is very important motion as this is one of the
ways to trap the air having the wrong squeegee angle. I firm pressure is
very important...a wimpy squeegee pressure will cause trapped air as
well.
SIDE HINGE
Side hinge is another way to
install long graphics that you cannot or do not want to cut apart into
smaller pieces. Now a way to help with the placement of the graphics we
use a registration mark.

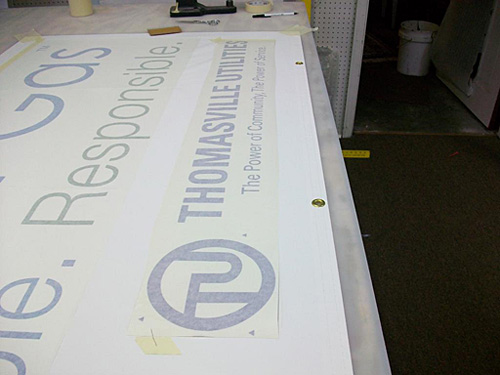
I use a piece of tape and mark a
line across the graphics onto the tape. So when you lift the graphic to
begin removing the backer you have a reference to reposition the graphic
straight. Also notice the triangle in the circle logo...I will talk more
about this registration mark.
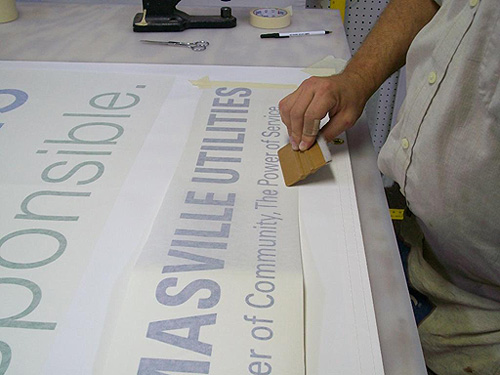
Again the backer
becomes the bridge to keep the graphics held off the banner until you
squeegee them.

REGISTRATION MARKS
When you have a 2
color job and have a tight registration try using triangle to help in
the placement of the multiple graphics. The first color you lay down
should have the triangles in place on the material when you apply the
graphics. The second layer you carefully cut the triangles to reveal the
triangles below like a window to align the triangle up. Tape into place
and install with a top hinge.


So there you go bubble free install of pressure
sensitive graphics on a banner.

|