|
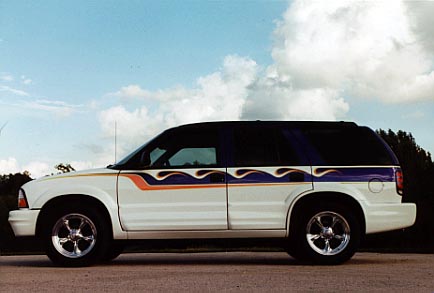
THIS ISN’T YOUR MOTHER’S BRAVADA! By Jack "The Italian" Giachino Coming in AutoArt Magazine July/August 2002 My 1985 S-10 Blazer had racked up a ton of miles and it was time to go shopping for something a little more dependable. My search took me though many Auto Shopper magazines and numerous dealers. I finally came across a low mileage; used Bravada that was within my budget and a deal was struck. As a step up from the S-10, the Bravada was totally different and unique for the first couple of months. Then it started happening. Everywhere I turned my head; another Bravada crossed my vision. It seemed like they were multiplying like rabbits. To top if off, they all seemed to be driven by moms, transporting the crew to another soccer or baseball game. My artistic ego was crushed. Immediate action needed to be taken. The transformation had to begin. First stop, the drawing board. With a stack of photocopied line art of Bravada’s in hand, the paint schemes started surfacing. But wait a minute, there were perimeters to work around. The vehicle would be driven daily, summer and Midwestern winters. I wanted colors that were cool, but easy to touch up. Plus, the colors should help to visually lower the vehicle. The design should not be too wild, but unique enough to turn heads. Oh yes, and let’s stay within a budget. I finally settled on the design that you see in this months step-by-step. The paint made a gigantic difference, but a few more modifications were needed to complete the package. A 2-inch drop all around via rear blocks in back and turned down torsion bars up front brought the height closer to the terra firma. Re-routing the exhaust out the rear quarter cladding just looked like it belonged there and the Boyd wheels…well, 17-inch Boyd wheels weren’t really totally necessary, but some things you just talk yourself into. Now as I wheel around town, I really don’t even notice the other Bravada’s, because I know that the one I’m piloting won’t ever be mistaken for your Mother’s Bravada again! |
|

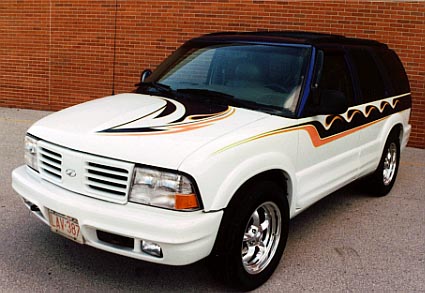
THIS is your Mother’s Bravada. Every time I turned my head there was another one. Something had to be done! |
|
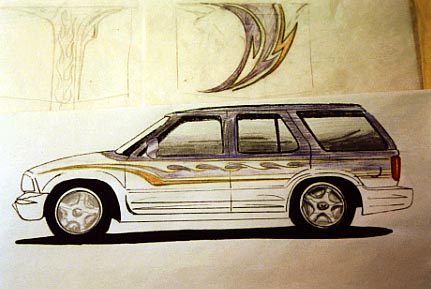
As usual, I like to go to the sketchpad before I go to the metal. Even if you decide to make changes along the way (artists do that kind of stuff). The sketch gives you a solid foundation to start with. |
|
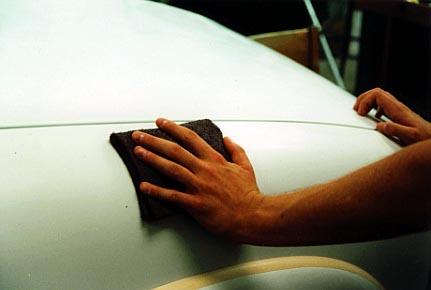
A scuff pad breaks the surface where the graphics are to be applied. Masking tape protects parts that do not need to be scuffed. The roof rack has been removed for ease of painting. |
|
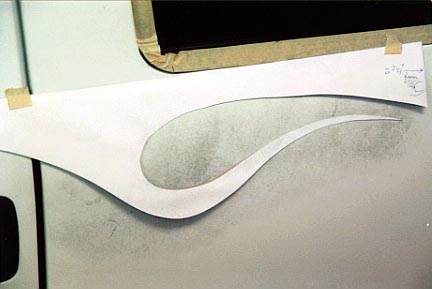
I made a "flame" template out of tag board. It was transferred to the vehicle, five times per side. This was an easy way to get a consistent repeat pattern on both sides. |
|
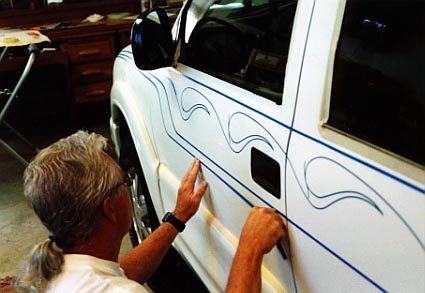
Blue line tape was used to mask the design. The curves of the "flame" pattern were done in 1/8- inch, while 1/4-inch worked better for the long straight lines. |
|

I opted to go with an "asymmetrical" design on the hood, rather than a traditional center balanced design. Remember: As you tape out your design, don’t be afraid to make changes from your original concept. |
|

Now, what parts should be left open and which parts should be masked off? This is where that color sketch really comes in handy. |
|
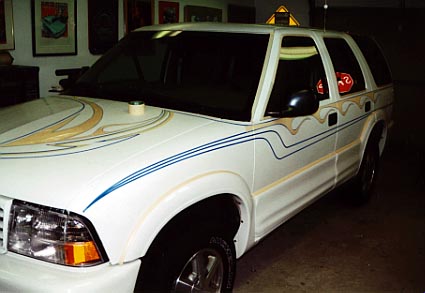
As the taping process continues, everything that will not be painted is masked off. Notice that the flames are filled with tape, as they will remain the color of the truck. |
|
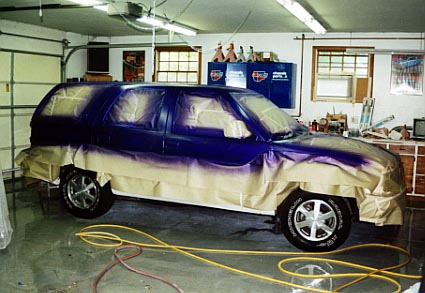
With all windows, mirrors, and lower body components masked off, the first color is shot. It is important to figure out a sequence of what colors are shot first, second, and so on. This eliminated a lot of extra taping and re-taping time on the job. |
|

The purple areas having been masked off and the pearl orange areas are sprayed next. Lowell Heise, of Distinctive Paint in Green Bay, Wisconsin, did a great job shooting the base colors and clear topcoat. |
|
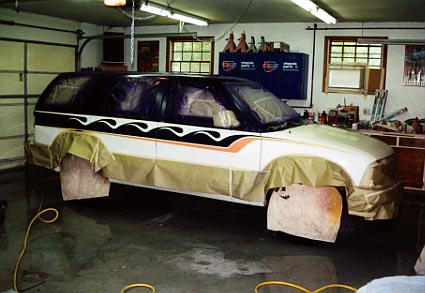
The removal of the tape around the designs reveals what we’ve been waiting to see. Those "negative space" flames really stand out against the purple. Wheel covers and new masking on the lower half of the vehicle makes it ready for clear. Note: The floor is wetted down to help eliminate dust. |
|
|
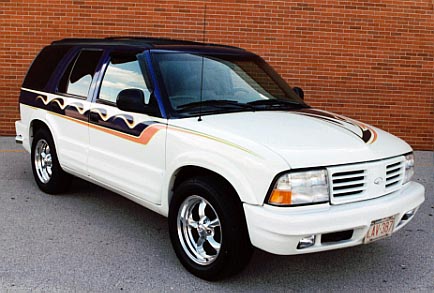
Sanded, buffed, and reassembled the Bravada takes on a totally new look. The "asymmetrical" hood design adds a unique touch. The 17-inch Boyd Coddington wheels and 2-inch lowering all around doesn’t hurt either. |
|
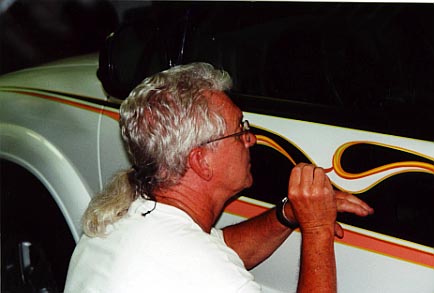
One Shot orange and lime green (a custom mix of primrose yellow and emerald green) team up with my "Mack" brush to provide some nice accent striping around the graphics. |
|
|
|
 |
|
A "little extra" was done by exiting the exhaust out the urethane cladding in the rear valance. Now when this baby goes down the street it won’t be mistaken for your Mother’s Bravada…unless your mother is married to me!
|
|
| Did you enjoy this step-by-step? This is just a small sample of the great articles you'll find in every issue of AutoArt Magazine. Click on the AutoArt logo, or any link, to go to their website. Get a subscription and have this wonderful resource delivered to you door! | |
|
[ Letterville | Join Us | Bulletin Board | Letterhead People | Merchants | More Step-By-Steps ] Copyright © 2002 The Letterhead Website |
|

